If your next YouTube video production involves speaking in front of a camera for more than 2 minutes, we highly recommend looking at setting up your equipment in a room where you can block ambient light and control the lighting environment.

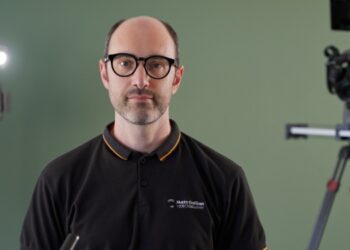
For the production of this series of YouTube videos (this image above), we have set up a temporary studio in an underground garage, where there is no ambient light. For each video, the recording took between 1-2 hours, scripted, with the help of a teleprompter.
Singling out the possibility of a change in light condition made it possible to record lots of takes, sometimes in random order, giving us more freedom during the recording session, and knowing that the final video will look consistent throughout.
Why is ambient light bad
Natural light coming in from a window is subject to changes in temperature and intensity (clouds and other factors). This means that in the middle of your recording there could be a gradual change in lighting condition, which will make your video look unprofessional, and will also make it hard to make cuts without noticing the difference.
Let me explain. If you’re recording a 2-page script in front of the camera, or you are talking off the top of your head, it will surely take a few times to get the recording right. Very few people can turn on the camera, record the piece and be happy with it, it’s actually really rare, so whether you’re dealing with a scripted video or an improvised one, we’re sure you’ll be recording a few takes before you get the job done.
Then, after maybe one hour of recording different takes and versions of the same script, you’ll find yourself with lots of footage to deal with.
Using editing software, you can make sense of it all and distil your work down to the final video. In this phase of your video production project, you probably find yourself wanting to pick and choose portions of the recordings, and this is where blocking ambient light come beneficial.
If all your footage looks exactly the same, you’ll be able to deal with the editing part with no headache at all, and you will have the freedom to pick and choose whichever parts of your recordings you would like to stitch together.
You can mix and match the best versions of your delivery, you could pick a phrase from take-10 and the next phrase from take-1, whichever part of the recording you would want to stitch together, your final video will still look consistent in lighting.
On the other hand, if during your recording the light condition is variable, you won’t have the same freedom. Well, you will have that freedom… but your video will look like it’s been patched together, and won’t be as good.
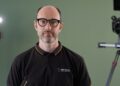
For the YouTube video above, here’s a behind the scene photo of the setup, so you can take a look at the type of location and setup.

Key takeaways
So, here’s what you can do to make your YouTube videos better and easily editable:
- If you’re recording during the day, do it indoors.
- Use thick black drapes to cover any windows and completely block any natural light source (the room should be pitch black).
- Recording at night might be a great option too for some people.
- Record in a dark space, where there are no windows at all (like the garage in the picture above).
- Use continuous lights and softboxes to light the subject and the background.
- Make sure the place where you’re recording is not too noisy (audio disturbances during the video recording can be a problem too).
Conclusions
Controlling the light is a key element of any professional video production, even more important than the quality of the cameras you’re using. In a scenario where the lighting conditions never change, you’re free to focus on what’s important, i.e. the quality of your delivery and the quality of the content. When your image is consistent throughout the whole recording, video editing will be a breeze.