In the vast and ever-growing world of YouTube, content remains the undisputed king. Aspiring creators often find themselves facing the conundrum of limited budgets and expensive filmmaking gear. However, the good news is that up to a certain point, the gear’s importance pales in comparison to the significance of compelling content. In fact, with the technological advancements in smartphones, creating impressive YouTube videos on a budget is now more achievable than ever.
Creating YouTube videos on your phone is an incredible alternative that empowers you to express yourself, share your passions, and connect with a global audience. It’s especially suitable for beginners or those who simply want to create content that looks more “casual”, more authentic, and less polished than a professionally produced video.
Whether you’re sharing your adventures, teaching valuable skills, or showcasing your unique talents, the possibilities are endless. The beauty of using your phone as a recording device is that it offers convenience beyond measure, you can capture moments of inspiration and share your story wherever you happen to be.
So, let’s embark on this exciting journey together and explore the fascinating world of making captivating YouTube videos using just your phone! With this approach, you’ll find it easier to dive into the realm of content creation and unlock the potential within you.
1. Unleash your creativity
The first step in creating any YouTube video is to let your imagination run wild. Take a moment to brainstorm ideas and identify what truly inspires you. Whether it’s cooking, fashion, travel, or gaming, find a topic that ignites your passion and aligns with your interests. This enthusiasm will shine through in your videos, captivating your viewers and keeping them engaged.
After the brainstorming session, it’s crucial to establish some guidelines and design a content schedule that remains consistent. Avoid jumping from one topic to another, as it can lead to confusion among your audience. A well-planned and consistent content schedule will keep your viewers engaged and coming back for more.
2. Equip yourself for success
While your phone is a powerful tool, a few simple accessories can significantly enhance the quality of your videos. Consider investing in a tripod, phone mount or phone gimbal to stabilize your device and maintain a professional appearance. An external microphone will ensure better audio, capturing every word with more precision. And if needed, additional lighting can transform your videos, making you look your best on screen.
Lighting can truly make a significant difference, particularly when producing YouTube videos in a room. We highly recommend investing in lighting equipment such as a ring light or an LED panel. Not only are these options affordable, but they also yield substantial benefits. They are user-friendly to set up and will undoubtedly elevate the quality of your videos.
When it comes to microphones, we highly recommend getting a lapel mic that directly connects to your phone using a wire. You can easily find options like “lapel mic for iPhone,” for instance. This simple addition will substantially enhance the audio quality and voice clarity in your videos.
3. Create an ideal setting
Before you hit that record button, carefully select a location that complements your video’s theme, creating a strong connection between your message and the surroundings. Pay close attention to the background; a clutter-free and visually appealing setting will ensure your viewers’ focus remains on your content.
When choosing a spot, seek good natural lighting or consider setting up additional lights to illuminate your surroundings. Positioning yourself near a window during the day, with natural light (but not direct light) on your face rather than behind you, will result in a more visually pleasing video.
For total lighting control throughout your entire video, especially for longer durations, we recommend blocking out ambient light and relying solely on artificial lighting. Here’s an article that explains how to block ambient light and the benefits it brings to your videos.
4. Fine-tune your camera settings
Before you begin filming, take a moment to adjust the camera settings. For the best results, we recommend shooting in 4K (as 8K is currently overkill and results in larger file sizes). This will provide your viewers with a visually stunning experience.
Here’s a handy tip: utilise gridlines as your secret weapon to frame your shots with the finesse of a seasoned filmmaker.
Pay close attention to the focus while filming, as some phones may struggle to maintain consistent focus on people, causing it to jump between the foreground and background, which can be quite annoying for viewers. If your phone supports manual focus, consider using this function, especially when you’re sitting and engaging with your audience. This way, you can ensure a steady and clear focus on yourself, making your videos more enjoyable to watch.
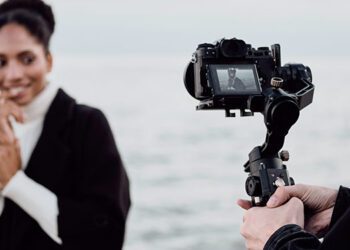
5. Lights, camera, action
With everything in place, it’s time to start recording! Securely position your phone on the tripod or mount, double-check the framing, and hit that record button. Remember, confidence is key. Speak clearly, maintain eye contact with the camera, and let your personality shine. Don’t be afraid to make mistakes; they add authenticity and charm to your videos.
Another helpful technique is to use a teleprompter app and prepare scripts in advance. This approach allows you to deliver your content more smoothly without the pressure of remembering everything on the spot.
6. Master the art of editing
After capturing your footage, it’s time to transform it into a polished masterpiece. Transfer the clips to a video editing app on your phone or download one if you don’t already have it. Trim the beginning and end of your video to ensure a smooth start and finish. Remove any bloopers or unwanted segments that may disrupt the flow of your content. You can also add creative effects, smooth transitions, and overlays to elevate the visual appeal.
When it comes to editing your videos on your phone, there are some fantastic free options available for both iOS and Android users. Let me introduce you to two popular video editing apps:
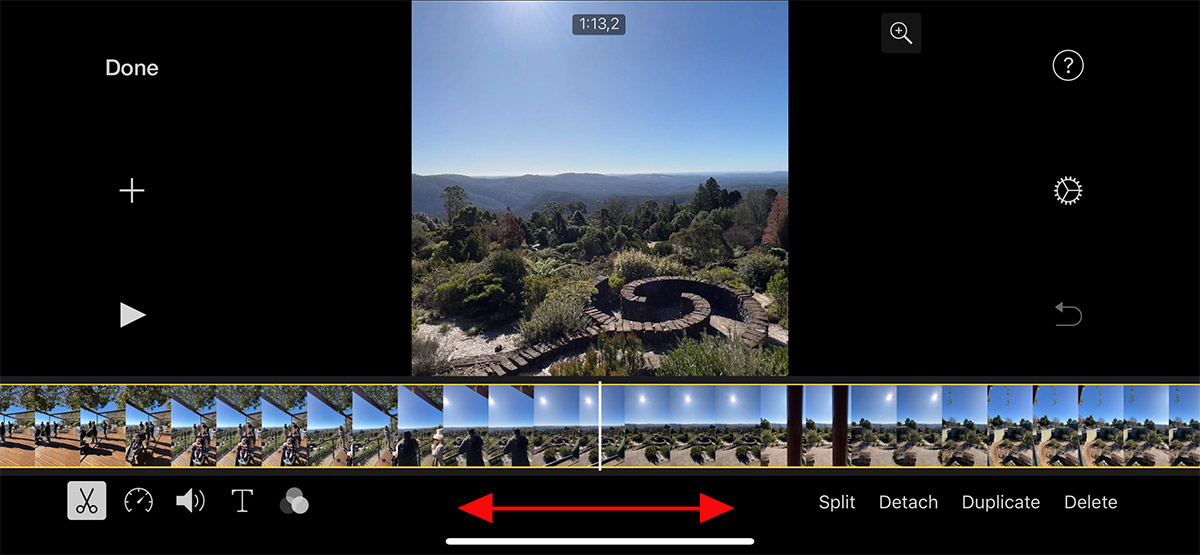
For iOS users, iMovie is an excellent choice. This app comes pre-installed on most Apple devices, making it easily accessible. iMovie offers a user-friendly interface, allowing you to trim, rearrange, and combine video clips effortlessly. You can also add creative effects, transitions, and overlays to enhance the visual appeal of your videos. With its intuitive features, iMovie empowers you to create polished masterpieces directly from your iPhone or iPad.
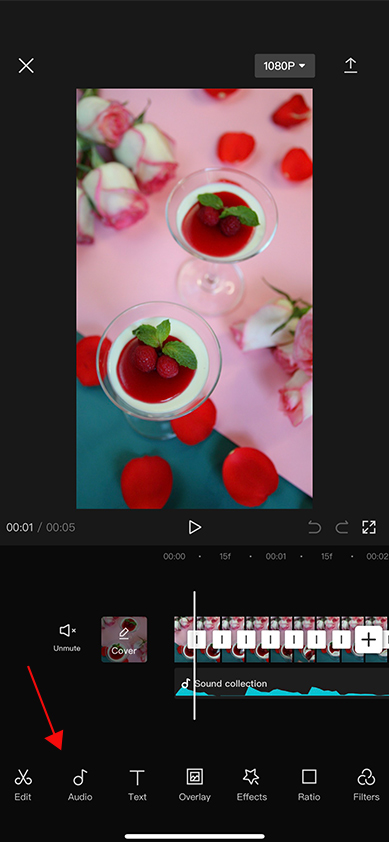
For Android users, a highly recommended video editing app is CapCut. Developed by Bytedance, CapCut offers a comprehensive set of editing tools and features. With CapCut, you can trim and merge video clips, apply filters and effects, add text and stickers, adjust speed, and incorporate transitions. The app also provides advanced features like keyframe animation and chroma key for more intricate editing needs. CapCut’s intuitive interface and powerful editing capabilities make it a favored choice for Android users who want to create professional-looking videos with ease.
Both iMovie and CapCut offer robust features and functionality for editing videos on your phone, ensuring that you have the tools necessary to transform your raw footage into a polished masterpiece. Whether you’re an iOS or Android user, these apps provide a solid foundation to elevate the visual appeal and storytelling of your YouTube videos. So, feel free to explore and unleash your creativity with these powerful video editing tools at your fingertips!
7. Enhance the audio experience
Great visuals are complemented by exceptional audio. If you used an external microphone during filming, sync the audio with the video during the editing process. Adjust the audio levels to achieve a crisp and balanced sound. Your viewers will appreciate the professional touch and feel fully immersed in your content.
Music can greatly enhance your YouTube content. However, it’s crucial to be cautious about copyright rules, as using any music you like may lead to issues. To ensure compliance, consider using YouTube’s audio library, which is readily available in your YouTube Studio dashboard.

Alternatively, you can subscribe to a music library dedicated to content creators, such as Soundstripe or Artlist, to access a wide selection of copyright-safe music. At the moment, Soundstripe is the music library we use for our professional video production work in Sydney.
8. Captivate with intros and outros
Engage your viewers right from the beginning with a captivating introduction. Use text, graphics, or a brief voiceover to set the tone and let your audience know what they’re about to experience.
Similarly, conclude your video with a memorable outro, summarising the main points and leaving your viewers wanting more. These elements add a touch of professionalism and make your videos stand out.
If you plan on creating a series of YouTube videos in the long run, it’s worth investing some time in creating a 3-5 seconds stinger, typically placed right after the intro, to enhance your branding. If you’re not familiar with creating a stinger, you have the option to hire someone on platforms like Fiverr or Upwork to create one for you.
9. Export
With your video edited to perfection, it’s time to export it in the ideal format and quality for YouTube. We recommend using the resolution of 1920×1080 pixels (Full HD).
Most popular apps or software today provide ad-hoc export settings specifically tailored for YouTube, so you don’t need to worry too much about the technical details.
10. Craft an enticing thumbnail and metadata
When uploading your video to your YouTube’s channel, remember that a visually striking thumbnail is the gateway to your video. Design one that stands out and accurately represents your content. You can use image editing apps or YouTube’s built-in thumbnail editor to create a captivating image.
Additionally, don’t forget to optimise your video’s metadata. Add relevant tags, choose the appropriate category, and craft a compelling video description to help your video get discovered by a wider audience.
11. Publish, promote, and engage
Congratulations, your video is live on YouTube! But your work doesn’t end there. Share the video link across your social media platforms, embed it on your website or blog, and let your friends, family, and community know about your latest creation. Engage with your viewers by responding to comments and building a connection with your audience. Remember, building a loyal and engaged community takes time and effort.